Redirecting Between Two Custom Domains Using Route53 + Cloudfront
Rage against the machine.
I literally don't know why this is difficult information to find. Here's a guide in case, like me, you run into this issue after 2024. If you have read my other posts and don't have this issue, please skip this one – I promise it's too boring.
Problem
Let's say you have two domains, both in Route53: olddomain.com and newdomain.com. You used to host/point some stuff to old, now you want to migrate everyone over to new. For whatever reason, Route53 doesn't expose a direct capability for this, and the tutorials online are stupid and/or wrong. There are a thousand suggestions of "just host nginx on EC2", "use an ELB", or even "use S3 but don't actually put anything in the bucket haha", none of them are as simple as this method.
Solution Overview
We're going to create a snippet of Javascript that takes incoming requests on your old domain and responds with a 302 redirect to your new domain.
- Create SSL cert for old domain
- Create Cloudfront "edge function" to perform javascript redirect to new domain
- Create Cloudfront distribution to call edge function when request is made to CF url
- Question your life choices
- Create alias for Cloudfront distribution with Route53 on old domain
Step 1: Create SSL Certificate
- Go to AWS console and sign in
- In the searchbar, search for "Certificate Manager"
- Hit "request" in the top right. On the next screen, just click next. Nothing there applies to you if you're reading this.

- On Request Public Certificate, type in
*.olddomain.comwhere olddomain is replaced with your actual old domain you want to redirect FROM. The * character makes sure this certificate will apply to all subdomains of this domain name. Skip the rest of the steps here and move on with "Request." - On the next screen, you'll see lots of information – you can safely ignore most of it. For Route53 domains, this process happens automatically. If you don't see a green "Issued" after about 5 minutes, click the "Create records in Route53" button, and follow those steps.
Step 2: Create Cloudfront Function
- In the search bar, search for "Cloudfront"
- Cloudfront is a global service, so you will be in the global zone. That's ok!
- In the sidebar, go to
Functions
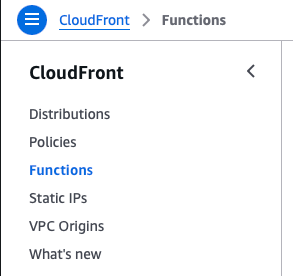
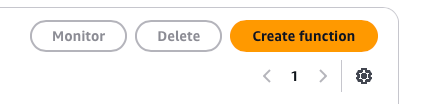
- Click Create Function. You can name it whatever you want. It doesn't matter which runtime you use, but select
cloudfront-js-2.0anyways and then Create Function again.
- You'll be presented with some info about your function, ignore all of it and scroll down to Function Code. Then paste in the following:
function handler(event) {
    // Get the incoming request URI (path)
    var requestUri = event.request.uri;

    // Construct the new URL, maintaining the path
    var newUrl = 'https://newdomain.com' + requestUri;

    // Handle the root path specially
    if (requestUri === '/') {
        newUrl = 'https://newdomain.com';
    }

    // Return a 301 (permanent) redirect
    var response = {
        statusCode: 301,
        statusDescription: 'Moved Permanently',
        headers: {
            'location': {
                value: newUrl
            },
            'cache-control': {
                value: 'max-age=3600'
            }
        }
    };
    return response;
}
READ THIS NOW: make sure you change newdomain.com to your ACTUAL new URL. Don't just paste in this code and expect it to work!
- Click save changes in the top right. Then, go to the publish tab, and click publish function.

Step 3: Create a CloudFront Distribution

- Go back to the sidebar and click "Distributions."
- Create a new distribution using the button in the top right.
- The origin domain must be
olddomain.com. - Scroll down to the middle, to Function associations skipping the items in between. For
Viewer requestclick into the dropdown that saysNo associationand select CloudFront Functions. Then, in the next dropdown to the right, find the function we made earlier. - For the Web Application Firewall settings, you can click "do not enable." It's probably fine.
- Under Settings:
- For the Alternate Domain Names type in
*.olddomain.com - For custom SSL certificate, find the one we made earlier.
- For the Alternate Domain Names type in
- Now click "Create distribution."
- The origin domain must be
The deployment will take about 5 minutes. Go grab a coffee/beer/hug from your gf/bf. Don't have one? That probably explains what you're doing here!
- Find the URL for your cloudfront distribution (will look like
asdf1234.cloudfront.netand go to it in your web browser. You should seenewdomain.com. If you don't, go back and retrace your steps. Stop here until the CloudFront URL works as expected, redirecting you to the new domain.
Step 4: Associate CloudFront Distribution to Route53 Domain
Home stretch.
- Navigate to Route53 in the search bar, then go to hosted zones
- Find
olddomain.comin the list of hosted zones and open it - For the base url
olddomain.com, you have anArecord. Open that record and hit "edit." Now comes the tricky part. Ensure your cloudfront distribution is deployed before continuing.
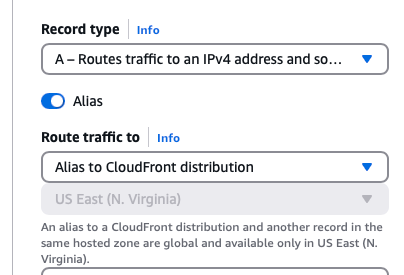
- Turn on "Alias" and then select "Alias to CloudFront distribution." The zone is locked because all CF distributions are in the global zone (N. Virginia.)
- Here's the part most tutorials don't seem to get right: you can just paste in the URL of your CloudFront distribution. Normally this field will populate when all the preceding steps are right, but for whatever reason, it doesn't always. But no matter! Paste in a valid CloudFront distribution url and it just... works. I assume that AWS' field validation on this field checks for *.cloudfront.net rather than for a "valid" one according to the steps outlined elsewhere.
- Wait for the record to update. Check the status of your domain with the
digcommand in the terminal.